This article is part of the 31 Days of Pinterest Hacks series. Find the main page for this series here.
Pinterest is chock-full of painting ideas for kids. Many of the images I find include children who can hold a paintbrush or stand at the easel and easily produce creative works of art.
Painting does not come so easily for children with sensory issues, fine motor or cognitive delays, or other disabilities. This post shares tips/ strategies to help you adapt a painting activity so that every child can enjoy creating with paint.
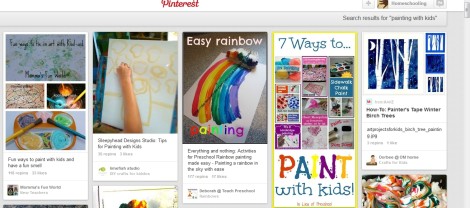
There is no lack of painting inspiration on Pinterest.
Why painting may be a challenge for neurodivergent and disabled children
- For children with fine motor delays, holding a paintbrush may be difficult.
- Even finger painting may pose a challenge for children with tactile sensory aversions.
- Children with cognitive delays may not be developmentally ready to produce images with or without a tool.
- Children who still mouth objects might be tempted to scoop up and taste paint (which may or may not be toxic).
Suggestions for adaptations/modifications for painting
- Begin slowly. If this is the child’s first attempt at painting (or if all others went badly), try to slow down the process. Modelling painting is an excellent way to begin.
- Use familiar tools rather than bare hands. While most school teachers and parents are encouraged to teach painting using fingers and hands, this may not work with a child with tactile sensory aversions. Finger painting is a great exploratory activity for some children, but the last thing you want is a meltdown! Give yourself permission to skip that step and move on to using tools instead—even if the child has fine motor difficulties. Don’t begin with the obvious use of a paintbrush. Instead, bring familiar objects the child already holds or plays with readily. Think plastic toys. The child isn’t expected to create a still-life at this point. Work on abstract art, so whatever pattern you can get with an object the child holds well is great.
- Introduce one color at a time. You might be tempted to take out all the rainbow colors just because it comes with the paint set, but I highly discourage this. First, it’s visual overload for children just exploring paint for the first time. You don’t want the child shutting down before they even get started. Begin with the primary colors (yellow, red and blue) and first acquaint the child with the lightest color. Make an all-yellow, all-red, and all-blue painting before ever mixing the colors. Do this over several days. Sign the names of the colors and repeat them as you paint. My son gets a kick out of the ASL sign for “yellow.”
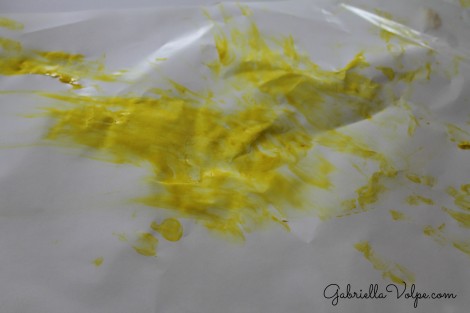
The first time I attempted painting with my son, he had a major meltdown because I went straight for the finger painting, thinking he’d love it. Instead, he was disgusted by the paint on his hands. Luckily, I had chosen to work with the lightest color, so it wasn’t so bad to clean up when it landed mainly on the two of us.
- Use non-toxic finger paints—even if you’re not finger painting. If you’re worried about clean-up of toys/tools/the child/ yourself, use finger paints (as opposed to Tempra) as they wash off everything easily.
I use paper plates for painting because it makes for fast clean-up even though it’s not very eco-friendly. As a parent of a disabled child, I need shortcuts, so please forgive me, Mama Earth!
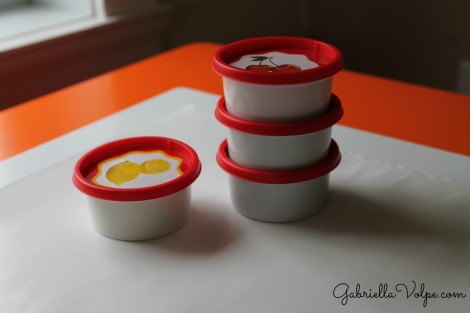
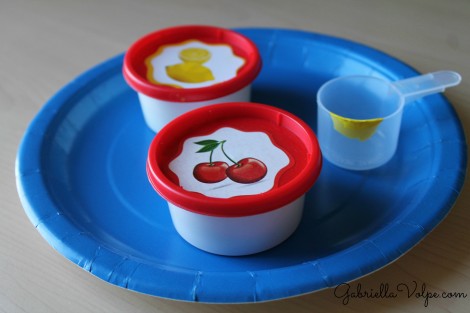
These are non-toxic finger paints that have a fruity smell to them. While that might tempt some children to taste it, my son, who doesn’t even want to touch them, enjoys the different scents instead. If you worry about the child putting paint in their mouth, make your own paint using food products like pudding. Pinterest is the place to be if you want to find homemade painting recipes.
- Vary the tools. Explore other tools that the child can easily grasp. Some additional ideas are egg cartons, fruits/ vegetables (apples, potatoes, carrots, and celery are solid enough to print with), and non-traditional art tools found at your local art supplier.
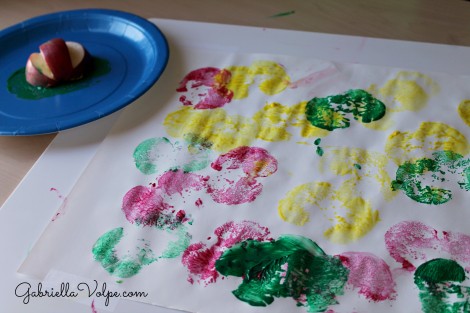
Cut into fruits and vegetables to create handles for easy gripping. (I’m always on the lookout for possible activities. I found this one on Pinterest and recognized its potential immediately.)
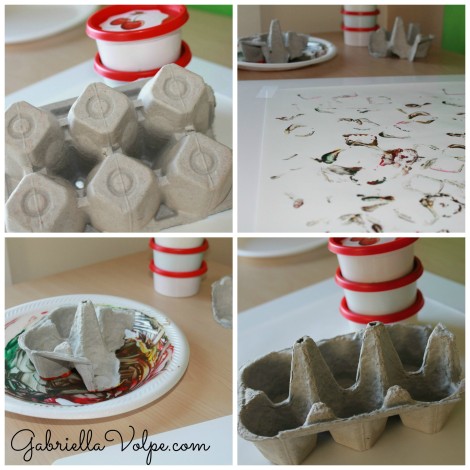
I also found this idea on Pinterest and knew in a flash that my little guy would be able to grab the inner part of the egg carton for stamping.
- Modify authentic painting tools. Sometimes, all you need to do is modify tools that are naturally intended for painting. For example, paintbrush handles can be thickened by taping foam around them.
- Practice the fine motor skills you’ll be using before the child ever paints. Introduce the unfamiliar paint tools at playtime. Vary the verbal routines: “tap, tap, tap” for tools that are best for printing, “zoom, zoom, zoom” for tools best for scraping, etc. When you bring the tools to the paint table, the child will anticipate what to do with them, and you will find the whole experience much smoother.

I found this tool at our local art shop. It’s made of silicone, and it’s weighted. Even though it’s intended for adult use, the top part fits nicely in most hands. I introduced this tool to my little one without using paint for a few days. He held it, tossed it, and mouthed it (of course). I also created a verbal routine, knowing the end goal was to use it with paint. I held it in my hand and repeated, “Zoom, zoom, zoom,” while he watched me whisk it back and forth. Eventually, I did it hand-over-hand (with consent), and he allowed me to do it while anticipating the “zoom” part. This was all done during play, without paint, for several days.
- Have all materials ready ahead of time. It seems like an obvious tip, but you don’t want to run across the room for materials while the child sits at the table with all the paint within arm’s reach. Have clean-up materials nearby as well. (Speaking from experience).
- Tape the paper onto a painting board. If you don’t already own one, make or buy a painting board. All it is is a board (plastic or wood) larger than your painting paper. This is great for kids who don’t use an easel. Taping the paper down prevents the paper from slipping and sliding and ending up on the floor. (Not only is this messy, but it disappoints, and possibly frustrates, the child when you have to reach down to keep picking up the paper when they just want to paint!) Having a paper taped to a board allows you to turn the board around or move it closer to the child so they can gain greater access to all parts of the paper.
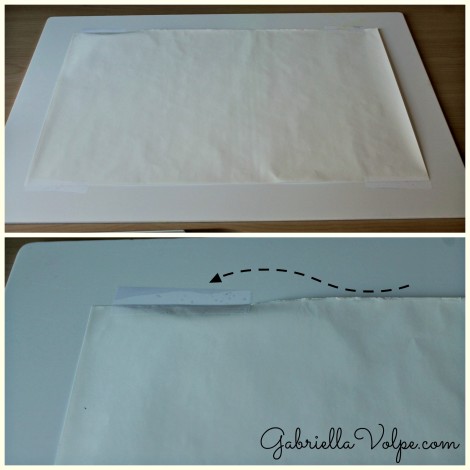
Painting with a child requiring significant fine motor support may sometimes be challenging. Use a paint board underneath the painting paper to make reaching all parts of the paper easier (you can quickly turn it or bring it closer to the child). Tape the sheet to the board, so the child doesn’t repeatedly toss the work of art on the floor.
- Sing or tell a story while painting. Try to incorporate other parts of your day into painting as well. Sing the apple songs you’ve worked on all week. Create a new story about an apple that likes to tap-dance, etc.
- Alter the positioning. If the child can stand at an easel, then that’s wonderful. Of course, painting doesn’t necessarily have to happen on an easel. The child can paint at their adapted chair/table or on the floor if that is easier. Play around with the positioning of the paper. Does it need to be flat (horizontal), or can it be elevated slightly to better access for the child? If you don’t have a desk/table that slants, you can create one using cardboard or wood. If the child is often sitting, use their standing frame and encourage them to stand at an easel. The legs of the standing frame usually slide right under the legs of the easel for full access to the paper. Just be sure to adjust the height of either the easel or the stander.
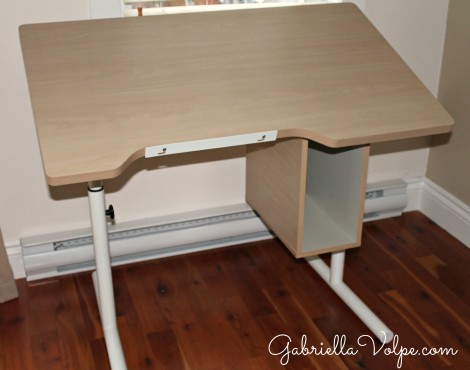
We don’t own an easel. When we paint, my son sits at this adapted desk (while seated in his adapted chair). His body is stabilized in this position so that we can focus on his fine motor skills. What I love about this desk is that it tilts upwards at varying degrees. We mainly use it horizontally, but it’s nice to have this option for some tasks.
- Have fun. While painting can be a messy activity, try to relax about it. Some adults can paint alongside the child, but don’t go there if you know the child needs your full attention. Paint on your own with the child observing you at another time.
How do you adapt painting activities?
Are you looking for additional support? I offer personalized consultations offering ideas such as these!
Great article once again!
I suggest for those who dont have tilting table to use a 2 or 3 inch binder to angle the work of art.
That’s a great idea, Chantal. I think there are more and more slanted pieces of equipment on the market today, but when you can create something for cheap, it’s even better!
Love your adapted painting ideas, Gabriella. Your words, “For children with tactile sensory aversions, even finger painting may pose a challenge” rang So True!!
I came across an idea for finger-painting minus the “getting-the-hands-dirty” part of it. My son loved it!
http://koogleskorner.blogspot.com/2013/10/fall-finger-painting.html
Thanks for another great post!
I will try that painting tip, Koogle. I’ve adapted playdough play in a similar manner, and will definitely try it with finger painting too! Thank you!